

Well over a year ago my husband gave me a grain grinder that goes on our little bosch mixer. I tried grinding a few different grains only to find that it was WORTHLESS in grinding anything into an acceptable flour. So I retured it to the website for store credit and ended up getting a tortilla press for making gf flour tortillas. It's been sitting in our pantry ever since, untouched. I was just putting the first batch of Naan on the pizza stone to put in the oven when I remembered it. I figured it would be too good to be true for it work to make naan but I'd give it a try anyway. So out it came and it.was.perfect.in.every.way! If you do NOT have a tortilla press, this recipe is still very do able, just much more a pain in the back 40! I'll give baking instructions for each way after I list the recipe...
Naan! Delicious, amazing, Naaaaaaan!
combine and let foam:
150ml tepid milk
1tsp sugar
2tsp active dried yeast
SIFT in the bowl of a hefty stand mixer
275g white rice flour (brown MIGHT work, but I haven't tried it yet. I'd like to, since it's a whole grain)
60g tapioca starch
1/2tsp salt
1tsp baking powder
1 tsp sugar
1 tsp xanthum gum
wisk together:
150ml plain yogurt (not sure the fat content makes much of a difference, but I always buy whole fat)
1 beaten egg
2tsp veggie oil
After the dried ingredients is well sifted, add your dough paddle and slowly add in the yogurt mixture and yeast/milk mixture. Let the mixer go on medium speed for a couple minutes until everything is combined well.

Now the tricky part, since the dough it so.stinking.soupy! Here's where the two different methods part ways.
FLATBREAD IRON:
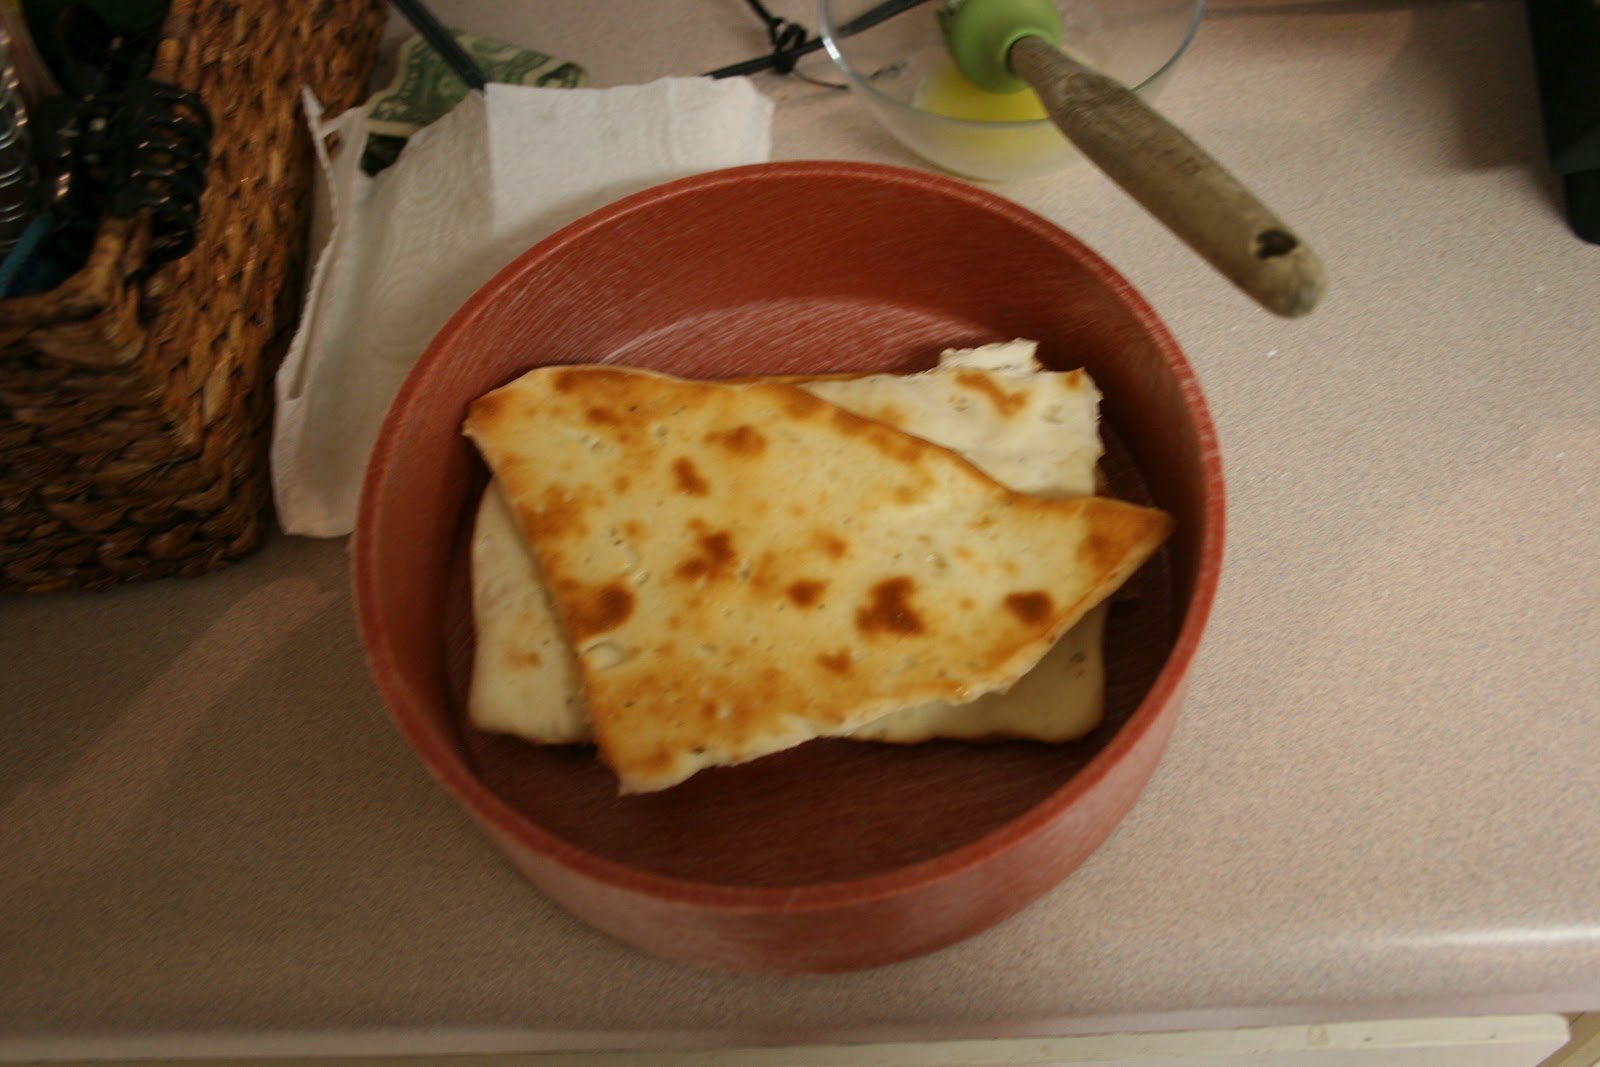
Preheat your iron and get your hands nice and coated with tapioca starch and grab a good sized ball of dough out. It doesn't really matter of your roll it or not, it depends on how uniform you want your finished product to appear. Slap it down on to the iron. You may have to scrape it off your hands, it being ridiculous and sticky. Then just proceed like you would with any tortilla dough. Press the iron down just enough to start flattening out the dough. Lift the top up and rotate the dough slightly - so this four times until you have it all leveled out and then just let it sit and cook. You can flip it to see when it looks done enough and then brush that "done" side with melted butter. Flip it back over to let the "done" side fry in the butter for a couple seconds while you brush the not done side with butter. The done side will feel VERY crispy, but keep reading to learn that this is not permament. Flip it back over and let the other side cook. I didn't ever time how long I left the wads on, but it was probably just 2 or 3 minutes per side. Voi la!
Keep it all in a tortilla warmer or wrapped in foil while you finish the rest. It will feel REALLY crispy when you first take it off the iron, but softens right up and doesn't get soggy when kept warm and wrapped.


ROLL AND OVEN BAKE METHOD:
Ick. If you don't have a flatbread iron, I do not envy that you have to do it this way. This is the way I did it every other time, because it really IS worth it, but it's not easy, quick or much fun.
FIRST: preheat your oven to the highest it will go - for most this is 500degrees. Let your pizza stone heat with it. If not using a pizza stone, let your baking sheet preheat in the fully heated oven for at least 5 minutes before pulling out to put the dough on it.
Mix the dough and let it sit while you lay out two HUGE pieces of freezer paper. Tape one of them to the counter to create a surface to roll the dough on. Spray the heck out of the paper and then dust with tapioca starch. Slap the dough down on it and cover it up with the other peice of SPRAYED freezer paper. Roll it to about 1/4 inch thickness and pull up the top paper. Pull out a pizza cutter and cut it into the size of pieces you want. Now comes the ridiculous part. Since the dough is so soupy, you can't pull it up off the paper or even spatula it up, so you have to use kitchen scissors to CUT (I know!) the paper along the lines you just pizza cuttered (definitely not a word). Flip those and slap them down onto a PRE HEATED pizza stone or SPRAYED baking sheet and stick into the oven. :Let it bake on the first side for 2 minutes, pull it out, flip it and let it bake on the second size for two minutes. Pull it out and brush both sides with butter and return to the oven to brown for several seconds.
Wrap in foil until you are ready to eat - this softens and keeps it soft and toasty hot.
And your done!
Did I mention that it freezes like a DREAM?!! I wrap my pieces individually and put them all in a freezer ziplock. When you get a hankerin, pull a piece out, wrap it in a paper towel and heat in the micro for 1 minute. Check for doneness and consume!